Sunday, May 27, 2012

Saturday, May 26, 2012
Purchased a new chamber
Check out the new camera we bought. We are excited to be able to deliver better quality photos of our crafts, costumes, and props in the near future.
We bought the camera because we were tired of taking pictures from our phones and crappy digital cameras. We needed MORE!
We also bought it so we would be able to travel and take photos of costumes (Mainly Link photos) in faraway places on our schedule rather than a photographers and have to pay insane travel fees.
Also, no one knows what you want out of a picture better than you do.


 |
| "The Boots" official Tiki Crafts Mascot #1 |
 |
| "The Trouser" official Tiki Crafts Mascot #2 |
Sunday, May 13, 2012

Monday, May 7, 2012
Bracing up
A while back we found this tutorial on how to make craft foam armor: Penwiper's Craft Foam Tutorial but had not had a direct need to use it. A friend of ours asked us to help him with a last minute costume for renaissance festival. I would have loved to make him an entire outfit, but we didn't have the time. So he bought a fluffy shirt, grabbed some dickies, put on a belt he already owned, and we provided the finishing touch- the bracers.
 We made them out of craft foam because its fast, cheap, easy, and would probably only be one time use.
We took our link gauntlets as a model and cut out similarly shaped pieces. It doesn't look that great when they are flattened out like in the image.
 But once we shape them over the stove, they start looking much better. We glue them on with regular school glue. I know there is a process to seal them, make them hard, and paint them, but we didn't find that necessary for what we were using them for.


We had no need to paint them because we simply chose the foam in the colors we wanted the gauntlets in.
Once we were happy with the shape, we added grommets and some shoe lace we found off some old dress shoes. and voila!
I would love to hear what you guys think. More posts coming this week hopefully to catch up.
 We made them out of craft foam because its fast, cheap, easy, and would probably only be one time use.
We took our link gauntlets as a model and cut out similarly shaped pieces. It doesn't look that great when they are flattened out like in the image.
 But once we shape them over the stove, they start looking much better. We glue them on with regular school glue. I know there is a process to seal them, make them hard, and paint them, but we didn't find that necessary for what we were using them for.


We had no need to paint them because we simply chose the foam in the colors we wanted the gauntlets in.
Once we were happy with the shape, we added grommets and some shoe lace we found off some old dress shoes. and voila!
 |
| Our buddy Alex, sporting his new gear. |
Updates
- Its been a little hard to post because of Nursing school, and making renovations to the house because Marcus moved in with me. XD
- Also, since we had success with craft foam armor in this instance, we decided we could use it to make Ganondorf. Preliminary update on that soon to come.
- Malon is nearly done. I just need to paint the apron. Photo shoot should be coming soon.
- Renaissance festival headband soon to come
- I just made a costume for next renfestival, photo shoot coming soon also.
I hope you enjoyed this.
Malon Teaser
This isn't the whole costume on. It is done at this moment but not in this picture.
This is just a teaser till I get some professional pictures done. Hope you like it.

This is just a teaser till I get some professional pictures done. Hope you like it.

Friday, March 2, 2012
Its all because of Bowser
I think I did a pretty goooood job with the bowser brooch for malon. I began my first real attempt at making anything clay related. Ive had three trials and the second one was the best but it came at a cost. I made a pretty big mistake and I thought it would be important to share it with everyone. DO NOT paint polymer clay with spray paint. Apparently the petroleum in the clay reacts with the clay causing a reaction. It makes the surface very bubbly and sticky and it will never dry. Apparently you should condition the clay with gesso, and then paint it with acrylic paint or
Anything else water based. That was not the only lesson to be learned but at that point I thought all was lost and I had to start a third time (hence the third try) but I did not. I realized I could scrape off most of the paint really easily but I couldnt quite reach the inner bits like the eyes and inside the mouth. So I tried 'goof off' its a product sold at hardware stores thats ment to clean up crayon marks and graffiti. And that works wonders. It took all of it off without damaging the clay. Im sooo glad I could save it.
Now, I need your help to decide which bowser brooch for malon looks best, left or right?

Published with Blogger-droid v2.0.4
Published with Blogger-droid v2.0.4
Tuesday, February 21, 2012
M.I.A
Hey guys, sorry that I have been M.I.A lately. I recently got accepted into nursing school and have been pretty busy being a responsible adult and such.
I am trying to schedule in some craft time and I believe I am going to start working on stuff at least and hour or two on fridays.
I will be attending the Renaissance festival this Saturday so I will be posting pictures of something I made especially for this and hopefully I will get inspired by things there.
Thanks for sticking around.
Projects in progress: Ruppees, Malon costume, Mirror shield, Link photoshoot
I am trying to schedule in some craft time and I believe I am going to start working on stuff at least and hour or two on fridays.
I will be attending the Renaissance festival this Saturday so I will be posting pictures of something I made especially for this and hopefully I will get inspired by things there.
Thanks for sticking around.
Projects in progress: Ruppees, Malon costume, Mirror shield, Link photoshoot
Tuesday, December 13, 2011
For Freedom!!!!!
In my first post, I mentioned that I would be making kilts for an event called Tough Mudder. Here is a video that explains the event: http://toughmudder.com/video/. Nine of us decided that we would go with a Brave Heart theme and so I was asked to make kilts. I made 3 of them, 2 did wear kilts and the other 3 were made by Danish's boyfriend. Here I posted pictures of the 3 I made, sorry for the poor photos they were taken in a rush right before we left for the race.

 This is the one I made for myself: I wasn't too happy with it, I like the ones I made for the boys better. I did a simple waist band with two buttons on the side and left that side open with a slit for range of motion. The skirt has some pleads in the front, but the pictures make them hard to see. I ironed them, but they didn't stay very long except for there they are sewed at the top.I should have used some startch, or some interfacing or something to make them more permanent.


This is actually the first one I made, and I think it came out the best because I took the most time on it. And No, he is not nude under there, hes just wearing very skimpy under wear. Everyone at the even thought he was naked.


This one also came out pretty well, it was the second one I made. He has it on a little crooked, and i probly should have not made the slit so wide. I didn't bother hemming the bottoms because these were going to get very very destroyed and I anticipated them possibly getting thrown out (which they didn't), so I didn't want to put too much effort into them. I plan on making them again, but much much nicer and with a lot more effort so it is something to be kept and cherished and not be trampled through the gorges at Tough Mudder. By the end of the even the bottoms were very tattered. I hope to get some pictures of the ends soon and make another post about it.
As for working with flannel material, it is the best material I have ever worked with. I'm not sure why but it has been the easiest to sew, the easiest to cut, and the easiest to rip the seams if I make a mistake.
I ♥ flannel.
Friday, November 18, 2011
Ready.Aim.Fire
 Here is our attempt at making some "show" arrows. By show arrows I mean only meant for visual, they may work properly but these are in no way made to fly.
As most of you know I am just a slave in all of this and Marcus (my boyfriend) is the fanatic behind this. Well, his brother made him a replica bow for Christmas last year out of pvc and epoxy, and we only saw fit to make some bows for it.
We made them out of the regular wooden rods you can find at any craft or hardware store. They are 3/8" thick and are 31" in length (32" with the arrow tip). Sorry for the paleness of our wood, we have yet to find the right color stain for them, we attempted with the same stain we used on the leather, but that didn't turn out quite as we'd hoped. Using a dremel rotary tool, sand paper, and a file, we rounded out the butt end of the soon to be arrow and cut out a slot where the bow string anchors.


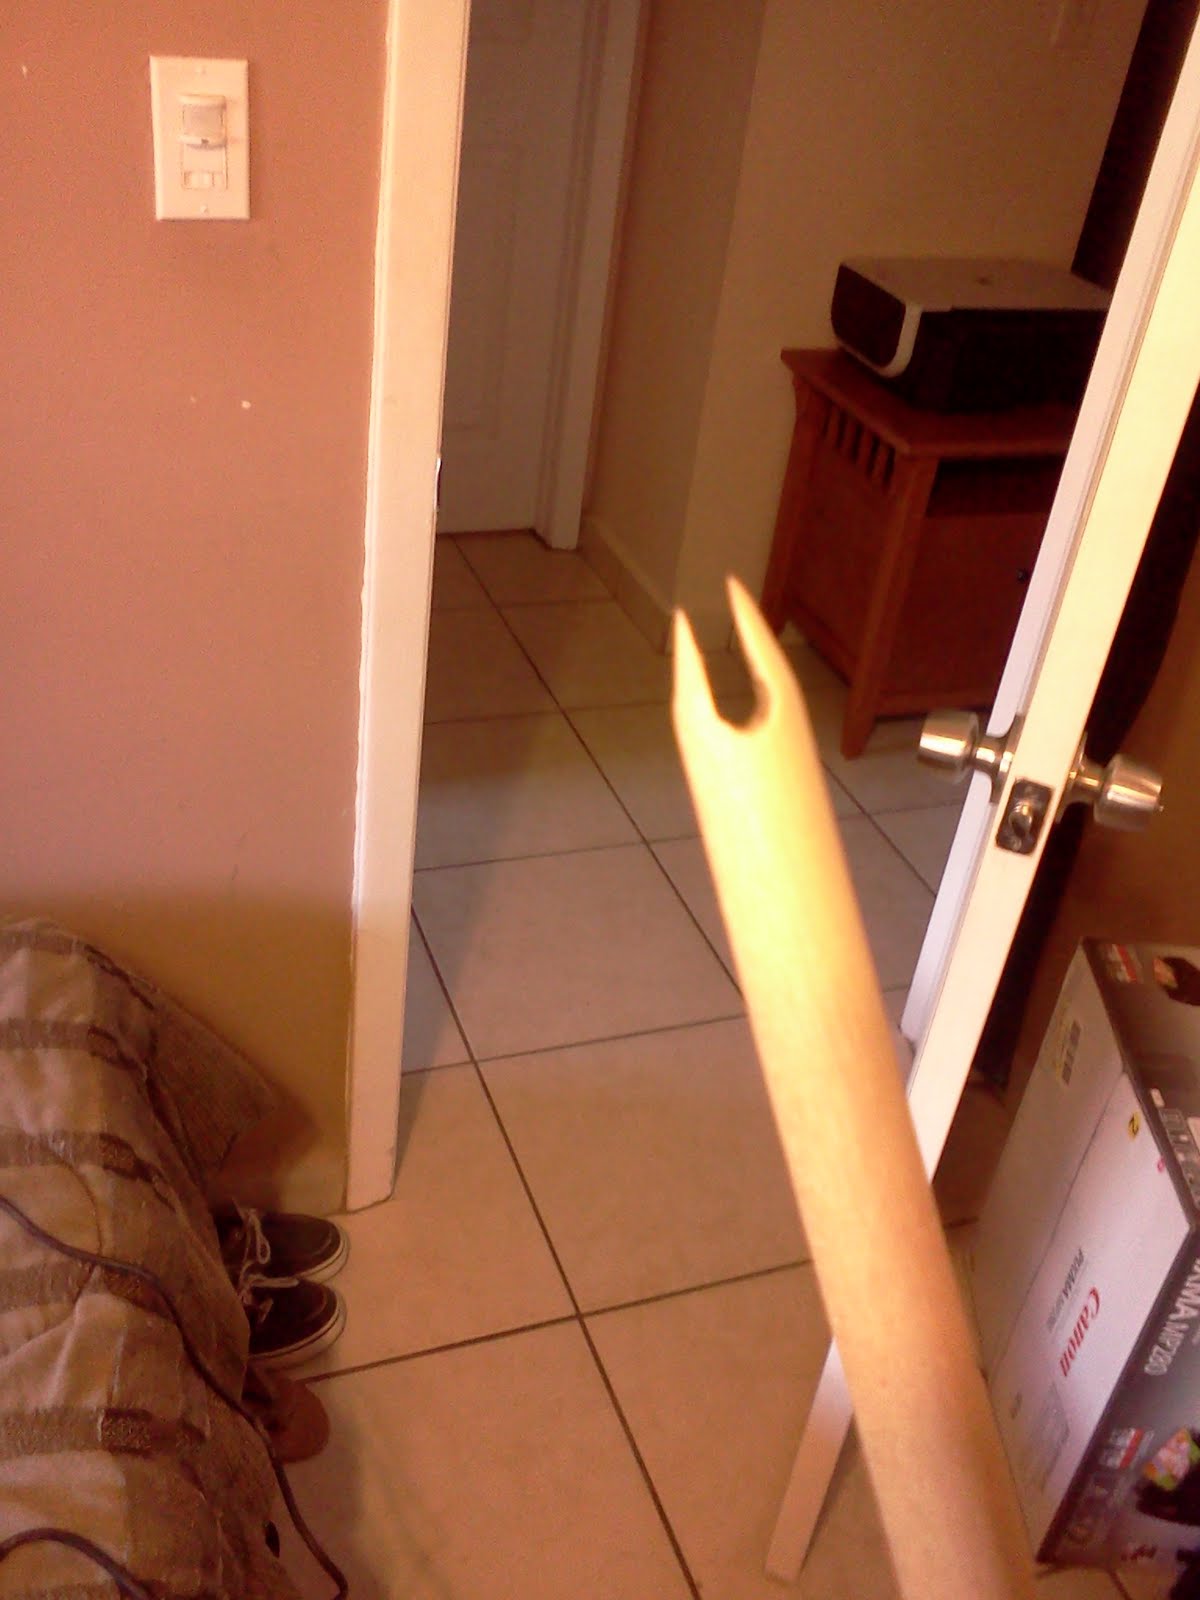 Using the same tools, we cut in a
 deeper, wider slit according to the size of your arrow head. We made the shit only as big as we need to, the arrowhead should fit in snugly and will make the fastening easier and more secure. Then, we sand it down to a point. Through trial and error, we found it best to make the slit before we brought it to a point.
 Next, we placed a little of hot glue down at the belly of the slit we made and began wrapping the arrow head in place for both looks
 and structure. We used dome twine covered in wax that we found in the bracelet/ bead section at walmart. The one on the left is the second one we did, so it came out a little neater. We tacked down the first little bit of string with some hot glue to keep it in place. We did not need to tack down the last one since it is covered in wax, you can squeeze it down into the rest. This part takes some practice and patience so it comes out nice and neat.
 Next, we come to glue the feathers on. We used fletching which is a hard turkey feather. It came with rounded edges so we just trimmed them with regular scissors to give them the hard edges we prefer. Marcus likes to put the hot glue right onto the wooden rod and then place the feather on top, but I like to put the glue on the feather instead, either way works fine. It is a little hard to press the feathers down onto the wood firmly with your hands so we used a glasses case to hold the feather. You could probably use a hinge, or a book. Make sure you glue the feathers down about a half an inch from the butt of the arrow to give your self some finger space (see pictures).


Let Us Know What You Think!

Saturday, November 5, 2011
Pretty in Purple. Malon update #1
I began making my costume for Malon from The Legend of Zelda, way before I even attempted to make the Link tunic you see in previous posts. I got frustrated with the fabric not falling the way I had imagined. I wanted it fitted at my waist and as ita fell, I wanted it to fall loosley and wave, using only one seam at each side. So now I've been inspired by another cosplayer, I am taking another try at it, but I am completely starting from scratch. When I first started I was obsessed with not having any seams since the video game doesn't feature any seams and neither do any of the cosplayers I admire.
As you probably know, I like to give costumes a more realistic vibe. So I posted a thread on Cosplay.com asking how others felt about adding realistic twists to costumes and one of the members whom replied to my thread gave light to the idea that most characters are stylized because of game graphics, with the time it takes to make the game, extremely detailed clothing is unrealistic. This is why I decided to change my mind set when it comes to making Malon's skirt, completely forget about seams and completely start from scratch, new fabric and all. Forgetting about the seams also allows me to get the wave and fall I am looking for.
After a nice lengthy trip to Joann's Fabrics in Plantation, I came up with this. XD

And then I realized that the appliques are BLUE!!!! Ive seen sooo many cosplayers do them purple, I thought they were purple. So I went back and found the most perfect blue fabric for the strips.

 |
| All of the fabrics together. |
I also made another trip to Daddys Leather Supply in Miami. I got another raw leather strap and used the same dye we used for the Link belts so they match. :} I got that weird vintage belt buckle that I am using as a base for the belt buckle so that the belt functions like a real belt and its stirdy. The blob of leather to the left is being used to cover the buckle. Once I cover up the buckle I am going to put the triforce and its frame over that. The whole point of covering the belt buckle is so that it looks like the belt is showing through behind it like in her picture.


Subscribe to:
Posts (Atom)